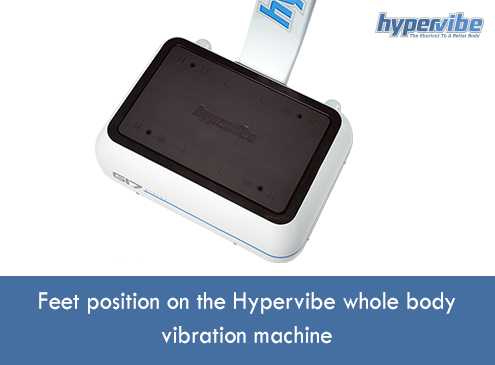
One of the major advantages of whole body vibration machines is that they allow you perform a variety of exercises that engage different muscle groups by simply changing your position on the platform. Unlike conventional strength exercise programs, where you have to constantly switch from one tool or machine to another if you want to target a different body area, on the Hypervibe WBV machine it’s enough to adjust the position of your feet or hands to increase the intensity and difficulty of the movements.
Vibration training is effective because the machine causes your muscles to contract and relax faster than during conventional strength exercises, and engages more muscle fibers compared to regular workouts. And the best part is you can exercise by simply standing on the machine; step on the platform and select the desired intensity and the machine will do the hard work for you. You’ll see that some positions work better than others for certain speeds or intensities, and in most cases, exercises for the upper body require lower frequencies than those for the lower body.
Also, lower frequencies are used for muscle relaxation, balance, coordination, pain reduction, joint flexibility and rehabilitation purposes, while higher frequencies are used for muscle toning and strengthening, for weight loss and cellulite reduction.
Now, let’s see how the distance between your feet influences the intensity and difficulty of WBV workouts. As a general rule, for pivotal whole body vibration machines, the plate vibrates around a central point, and the further away you travel from that central point, the greater the amplitude is. Hypervibe WBV platforms have 3 or 4 position marks, depending on the model, and each position indicates a certain difficulty level.
The first position, which is the closest to the platform’s center, corresponds to the lowest amplitude, or the lowest distance traveled by the platform’s outer edges. The Hypervibe machines have a peak-to-peak amplitude of 11 mm, which means the distance traveled by the outer edges, between the lowest and the highest point, is 11 mm. Because of the teeter-totter motion of the machine, the amplitude is not selected on the control panel, but by placing the feet in one of the positions indicated on the platform.
If you’re looking to do a beginner or lower intensity program for example, you should place your feet or hands at 1, or somewhere near the platform’s central point. The actual amplitude for the “1” mark on the Performance model is 2 mm, for the “2” mark is 4.2 mm, for the “3” mark is 6.6 mm, for the “4” mark is 9 mm and for the platform’s outer edges is 11 mm. When selecting the amplitude, you should use your big toe or pointer finger as marker.
As the amplitude and frequency increase, the G-force increases as well, and this parameter is the most important when it comes to developing your muscle power and strength, postural stability, coordination, balance or overall functional performance. Higher vibration frequencies combined with higher amplitudes generate maximum muscle activity, while higher frequencies combined with lower amplitudes activate the muscles in a less effective manner.
As said, the further apart your feet are on the platform, the more challenging the workout becomes, so if you refer to train at a lower frequency, you can still experience the benefits of whole body vibration workouts by increasing the amplitude, or placing your feet closer to the platform’s edges.
The position of your feet on the machine influences the G-force, as you can see in the table below:
To exercise at 2.7G’s of G-force for example, you’ll have to select a frequency of 18 Hz for amplitude level #2, or 11 Hz for maximum amplitude (platform’s edges). For 10G’s of G-force, you’ll have to train at a frequency of 28 Hz for amplitude level #3, or at 22 Hz for maximum amplitude level (platform’s edges). The further apart you place your feet on the platform, the lower the frequency will have to be for the same force output.
The Hypervibe machine can be used for a variety of health and therapy goals, and the selected amplitude, frequency and G-force will depend on the goal. While all combinations of amplitude and frequency are possible, these parameters should be set based on the goal of the training or therapy program. For example, if your goal is to improve your flexibility and mobility, the combination of low frequency (6-12 Hz) with low amplitude (level #0-2) can be a good choice, as it results in a workout intensity that is suitable for reducing muscle spasticity, relieving pain, relaxing the muscles and increasing circulation and joint mobilization.
A medium-intensity workout done at 6-12 Hz (low intensity) and #2-4 amplitude (high amplitude) may also be an inspired choice, as this combination of values is suitable for muscle relaxation and pain relief in acute and chronic pain, for increasing flexibility and balance, for improving the mobility of joints, reducing spasticity and increasing circulation.
On the other hand, if you plan to do a muscle strengthening workout, you should select a higher frequency and amplitude in order to generate the required level of resistance or G-force for improving muscle force and power. The combination of high frequency, high amplitude is suitable for improving postural stability and muscle strength, for advanced balance programs, for improving cardiovascular performance and circulation, stimulating the production of growth hormone, lowering cortisol levels, improving bone density and functional performance.
Given below is an example of frequency and amplitude settings for Beginner G-force levels.
If you have questions regarding the Hypervibe whole body vibration machines, feel free to post them below or join our Facebook community and share your thoughts with us there!

Updated on: 08.09.2021 The lymphatic system is involved not only...

Stress can make you gain weight – we’ve heard this...

Various theories exist to answer this question. As you will...

Both rebounding and jumping on a trampoline are excellent ways...

The health benefits of using vibration plates to burn fat...